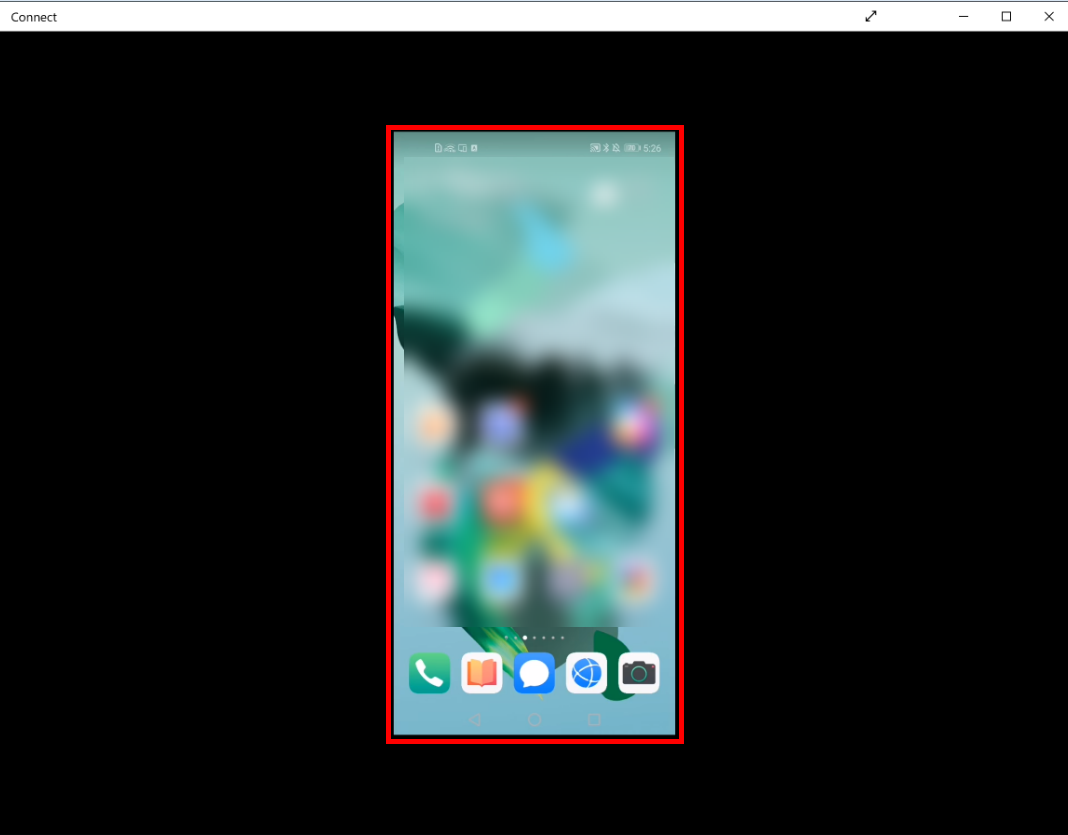
| Using the Connect app feature of Windows 10 to project my device to the computer |
- To project your device to the computer screen, perform the following:
(1) Click the network icon in the taskbar and enable Wi-Fi.
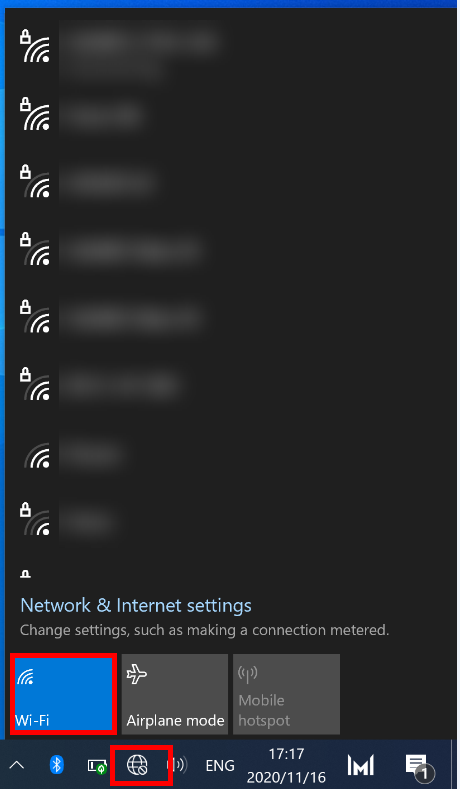
(2) Click the Windows icon and select Connect.
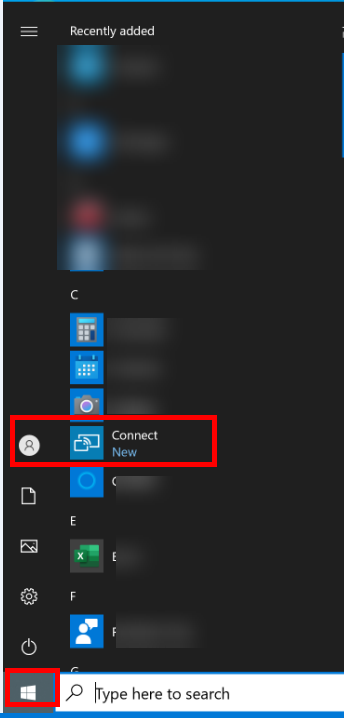
If you cannot find Connect after clicking the Windows icon, perform the following:
a. Connect your computer to the Internet. Click the Windows icon and then the Settings icon, and select System.
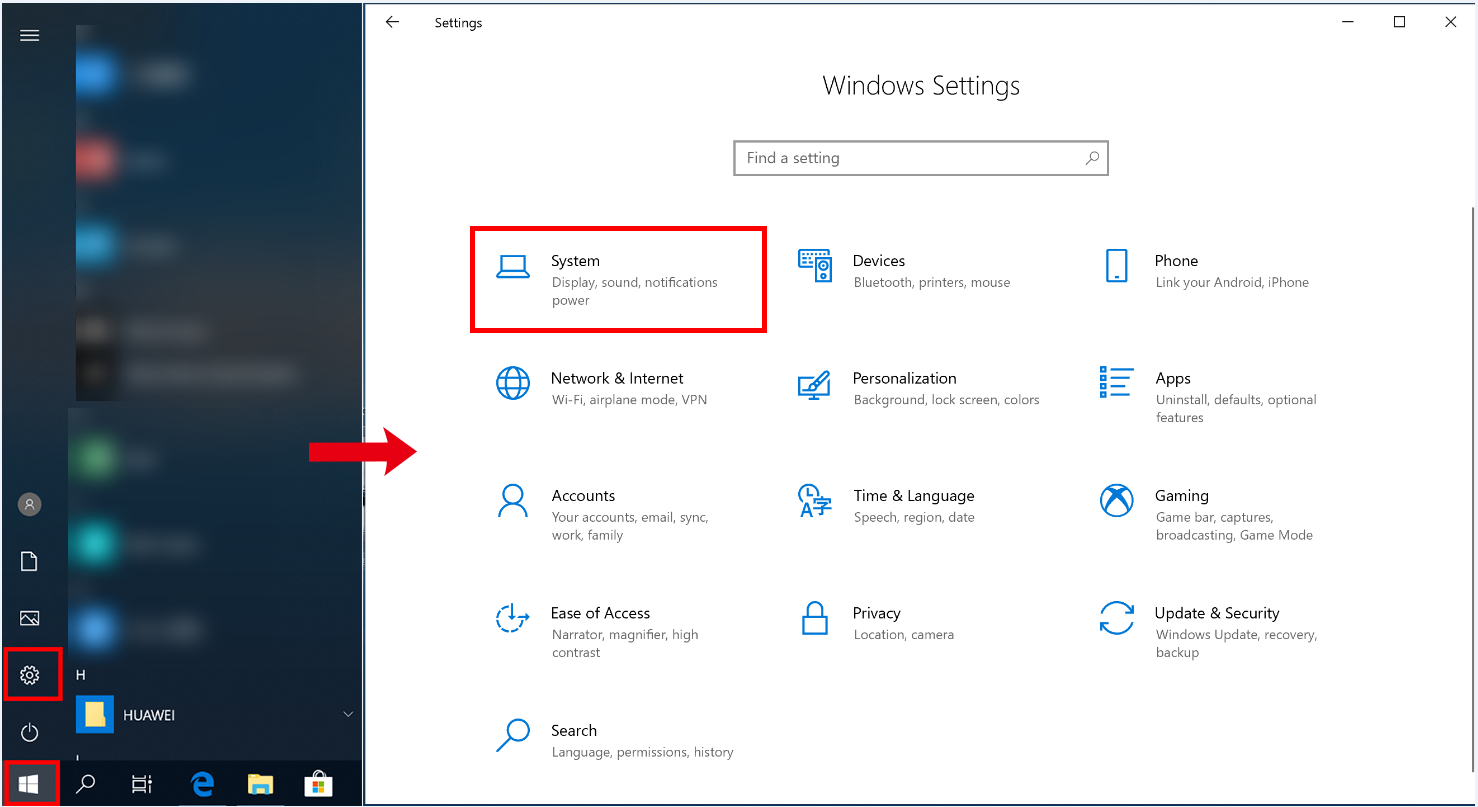
b. Click Projecting to this PC and select Optional features.
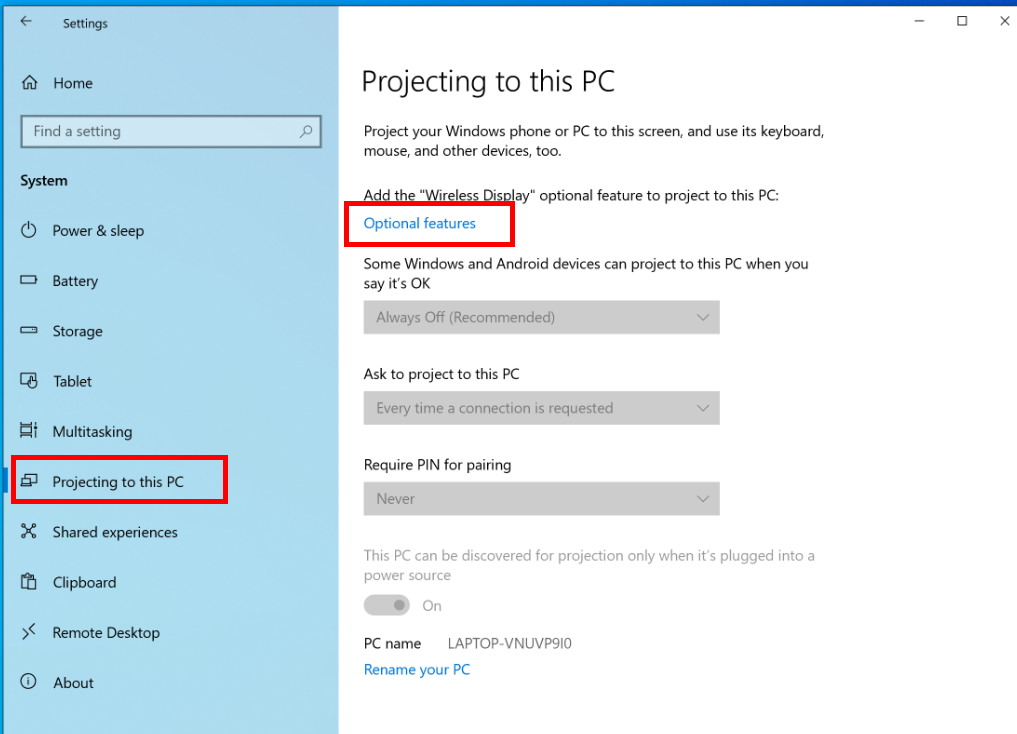
c. Click Add a feature.
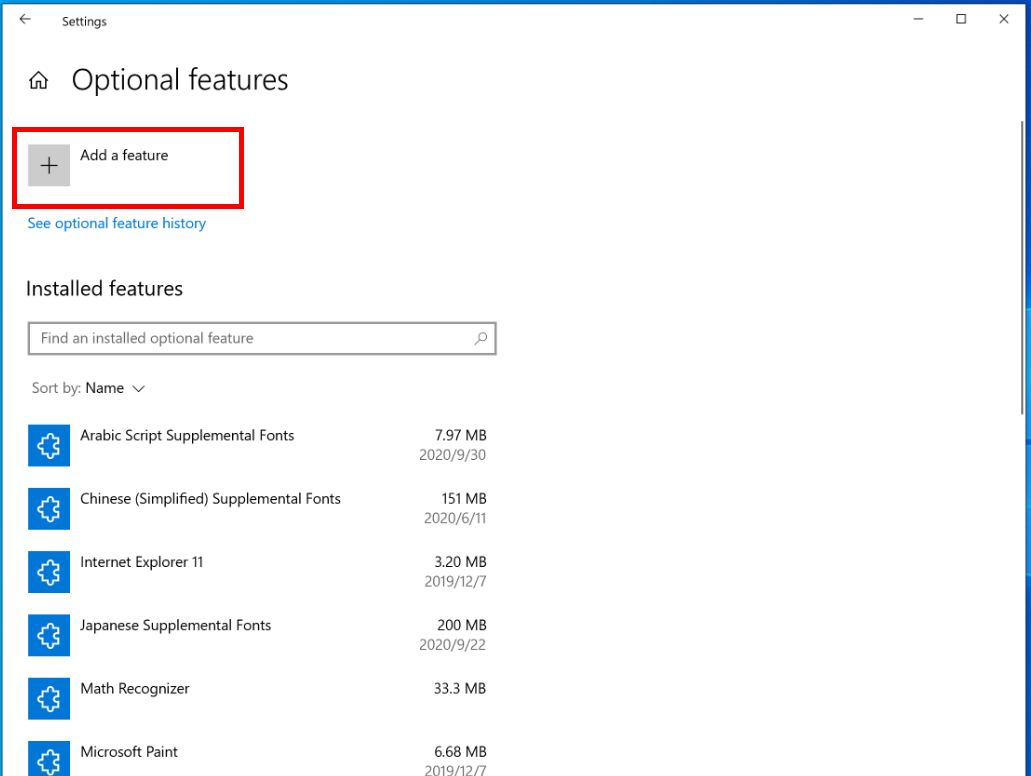
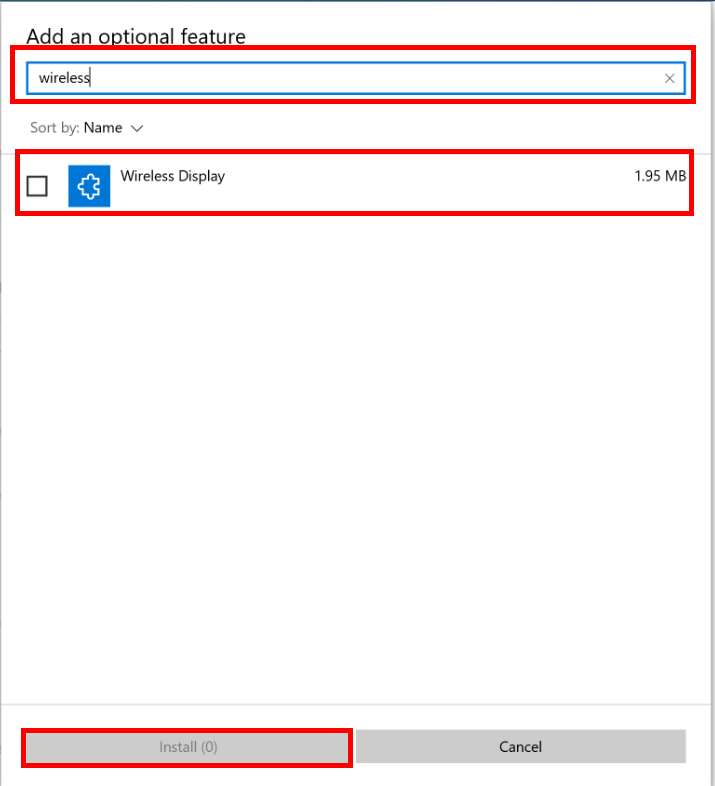
d. Click + next to Add a feature and enter "wireless" in the search box under Add an optional feature. Select Wireless Display and click Install.
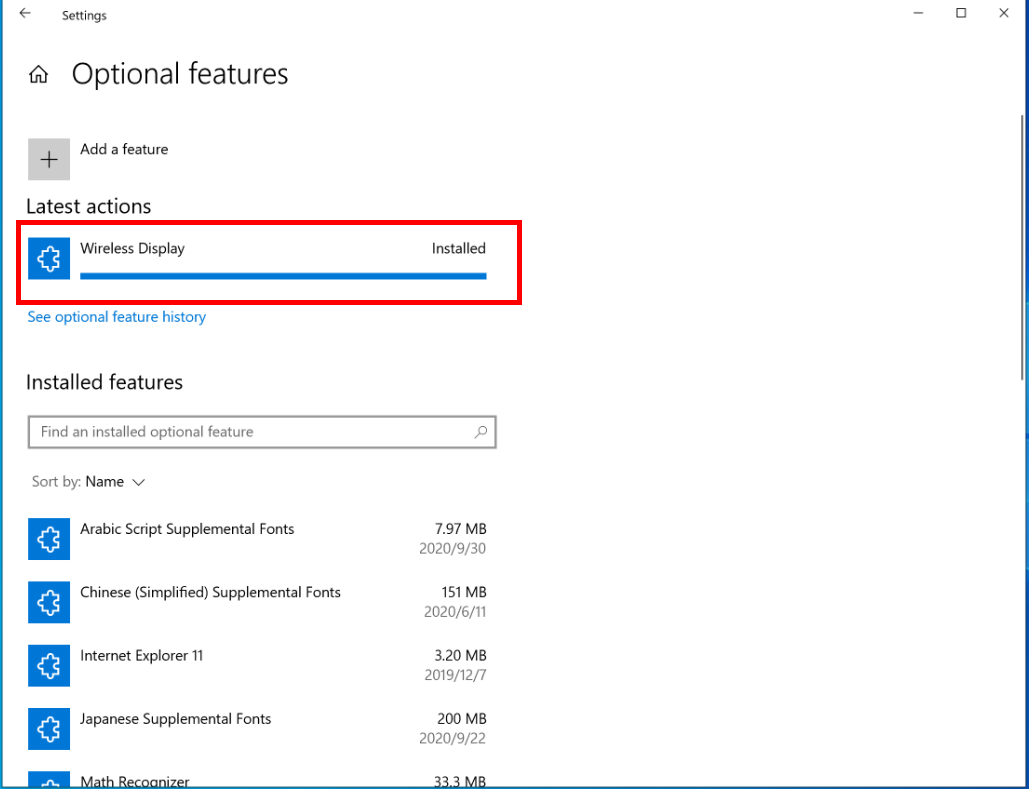
e. After the feature is installed, restart your computer. If there is an available update for your computer, update your computer and restart it. You will then find Connect app after clicking the Windows icon.
(3) Click Connect. You will then see your computer device name, and you will also be prompted with the message indicating that wireless projection is available on your computer.
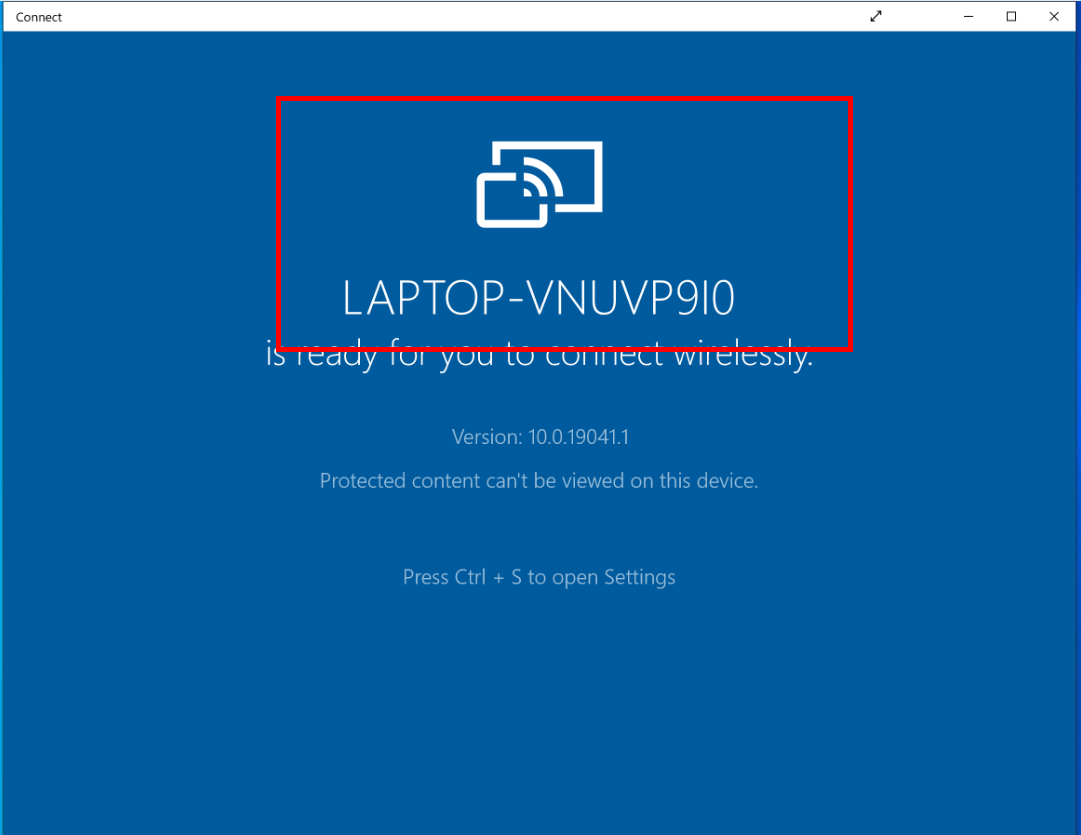
- Enable the wireless projection feature on your other devices including your phone, tablet, or other computer, select your computer name in the available device list, and connect both devices.
- The actual path to enable the wireless projection feature varies depending on the device models. For details, consult device retailers.
- The wireless projection feature of your phone may be affected if you have connected your phone to the computer using PC Manager. Disable both devices first then try again.
Using the HUAWEI P30 as an example:
(1) Swipe down from the status bar and enable Wi-Fi and Wireless Projection.

(2) Your phone will automatically search for nearby devices that can be projected to, and you can select the name of your computer from the list of available devices.

(3) Your phone screen will then be displayed on the Connect app window. To end the wireless projection, click the close button in the Connect app window or disable the wireless projection function on your phone.
